Wednesday, March 18, 2015

Personal Finance - Activity Days

I've recently had the opportunity to take on a role as one of two leaders for 8-11 year olds in my church. The group is called Activity days. Yesterday was my first opportunity to conduct an activity with the girls. We decided to have an activity around personal finances. I was able to make some play checks for the girls to play with. Each girl was given a "life" card that told her her marital status, how many kids she had and her monthly income. The girls would go to a station assigned to a specific bill they would have to pay, i.e. House payment, Car payment, Phone payment, Fuel payment, Grocery bill. At each station the girls would take a card that would tell her the circumstances of that bill, for instance a card might say that their last payment was late and they have a $50 late fee added to their new bill or that they had overpaid last month and had a credit. For the grocery circumstances would be that they had used their club card or coupons and saved money on their bill, or that they had underestimated and needed to spend a bit more. Some girls were lucky to get cards that said they had paid cash for their car and have no car payment. And some girls rode the bus so their transportation bill was minimal. Overall it was a fun night and I think the girls had a good time.

A special thing happened when one of the girls was in the negative according to her checkbook register. Another girl found out and asked if they were allowed to write checks to a friend, when I told her yes you can guess what she did. With her "extra" money she wrote a check to her friend to keep her out of the red (which she ended up in by the end of the evening anyway). The giver whispered in my ear how good she felt to be able to do that for her friend. What a great example these girls are helping one another out in their time of need. So glad I was able to feel the sweet spirit they have to share.

Here is a sample of the play checks the girls used, I think they really liked having their own checks to write out.
A couple of different color options for the girls to choose from. I actually didn't take pictures until after our activity so one of the colors was picked clean. Had I know it would be so popular I would have made more of that color!
  This is a savings thermometer, the girls can track their savings progress. We've actually used this to help our kids see our progress as a family when savings for different things.
 Savings thermometer with "checkbook"
In addition to the "checkbook" and savings thermometer we gave the girls a sample of a checkbook register to help them keep track of their faux checking account.
 Washi tape takes these "checkbooks" from homemade to WOW!
So grateful for my co-leader and her willingness to help keep order while I went over how to write a check and enter it into a register (not the most exciting time of the night), she's AWESOME!.....and so are the girls!

Monday, January 12, 2015

Scripture Journal

My kids LOVE cereal! I can't keep the cupboards stocked so I opt to not purchase it at all.....I know, I know, I'm a horrible mom! My boys go through it like it's water, plus it doesn't keep them full enough to get them through to the next meal. For my Scripture Journal I was in need of some light weight cardboard, something easily found on the cereal isle. Not only did I get what I needed, but the boys got something they wanted.
 

While Cheerios are NOT one of the kid's favorites, the box fit my size requirement (more than 8.5x11-inches), they were still excited to see this boxed goodie in our house.

I gently tore it apart at the seams & laid it out. I then cut it with scissors until it fit in my paper cutter to trim it down to the appropriate size.

Two pieces 8.5x11-inches, one for the front cover and one for the back.

Decisions, decisions. I had to call my daughter for assistance with this one.....so many fun prints!

I finally settled on the beautiful yellow print for the journal. The floral print will be the cover for another B.O.M.

I realized that I missed a VERY important step here. I cut my paper down to 8.5x11-inches then glued it down with a spray adhesive. I used the brand LOCTITE multi-purpose, it's repositionable while wet but dries permanent.

I hopped onto the computer & printed off a label, cut it, distressed it, attached it to a scrap paper that happened to match BEAUTIFULLY, then attached it to the cover.

Can I just say that I LOVE this stuff! I found this Heat-n-Bond vinyl at a local craft store in the fabric department. It's PERFECT for covering books with! It's slightly tacky on the backside (just enough to get it set into place). You then iron it on and presto, you've got a beautifully covered book (or in this case, journal).

Took it down to Office Depot (LOVE that place!) to have it bound.

Here is a look at the inside. My inspiration for this journal came from here


 One of my new years goals is to not just read my scriptures but to really study and dive into them, I'm hoping this will help me along with that goal!

You can be sure to see Heat-n-Bond again in my crafting in the near future.....I love the stuff!

Friday, December 26, 2014

T-shirt transfers

I've had this T-shirt vinyl for about a year now. I had grand plans for it but never got around to creating.....until now! I had so much fun & hope to be able to create more soon!

Tuesday, December 23, 2014

Advent, take two!

So in this previous post you can see that a friend and I made a Christmas countdown. At the close of my Christmas season, tragedy struck and my creation came crashing to the ground. Frustrated I tossed the banged up board in the garage {to be dealt with later} & gently set the tiles of Christ in storage until next year......fast forward to Christmas 2014! I put my shoulder to the wheel and get to work.....finally done, again!

 
Finished, & couldn't be happier!

Monday, June 30, 2014

One Fire Cracker 4th!

I LOVE the 4th of July! I grew up in a VERY small community where the town parade would go around twice (because it too was very small) & afterward, everyone would meet up at the park and participate in the 4th of July celebration, there'd be many different games & booths to choose from. As a youth I remember family coming up from the valley to participate in the festivities. My aunt would spend her year making different craft items to sell at the local craft show.....oh the memories! Unfortunately I'm not headed home for this fun filled holiday THIS year but I do get to help with table decorations for a 4th of July breakfast locally. I've seen these fun little *firecrackers* floating around the craft blog world (like the ones found here) and thought it'd be a great fit for our activity.
 
One down......a LOT to go!
 
 really though, the process goes super fast especially with an assembly line!
 
 Can't wait to see a sea of these little gems when we're all done!
 
 
Happy 4th & Happy Crafting!

Tuesday, April 22, 2014

A baby blessing & a baptism

Recently I was contacted by a friend asking if I could throw a couple of invitations together for her daughter's blessing & her son's baptism, both of which will be held on the same day. What a great idea! They have this day to share & remember together forever! Anyhow, here is a version of the invitations that came out of that request.


Monday, July 1, 2013

A wedding favor

A friend called to ask if I could come up with a nice way to present the seating chart for her daughter's wedding. Here's what I came up with.

Thursday, May 23, 2013

Build-a-library shower invitations

So I'm helping a friend with a Build-a-Library baby shower. I'm not going to lie, my friend is the mastermind behind this project but I was able to re-create an invitation she saw online...I'm pulling my weight ;). I can't wait for the celebration!


Thursday, January 31, 2013

derby slides

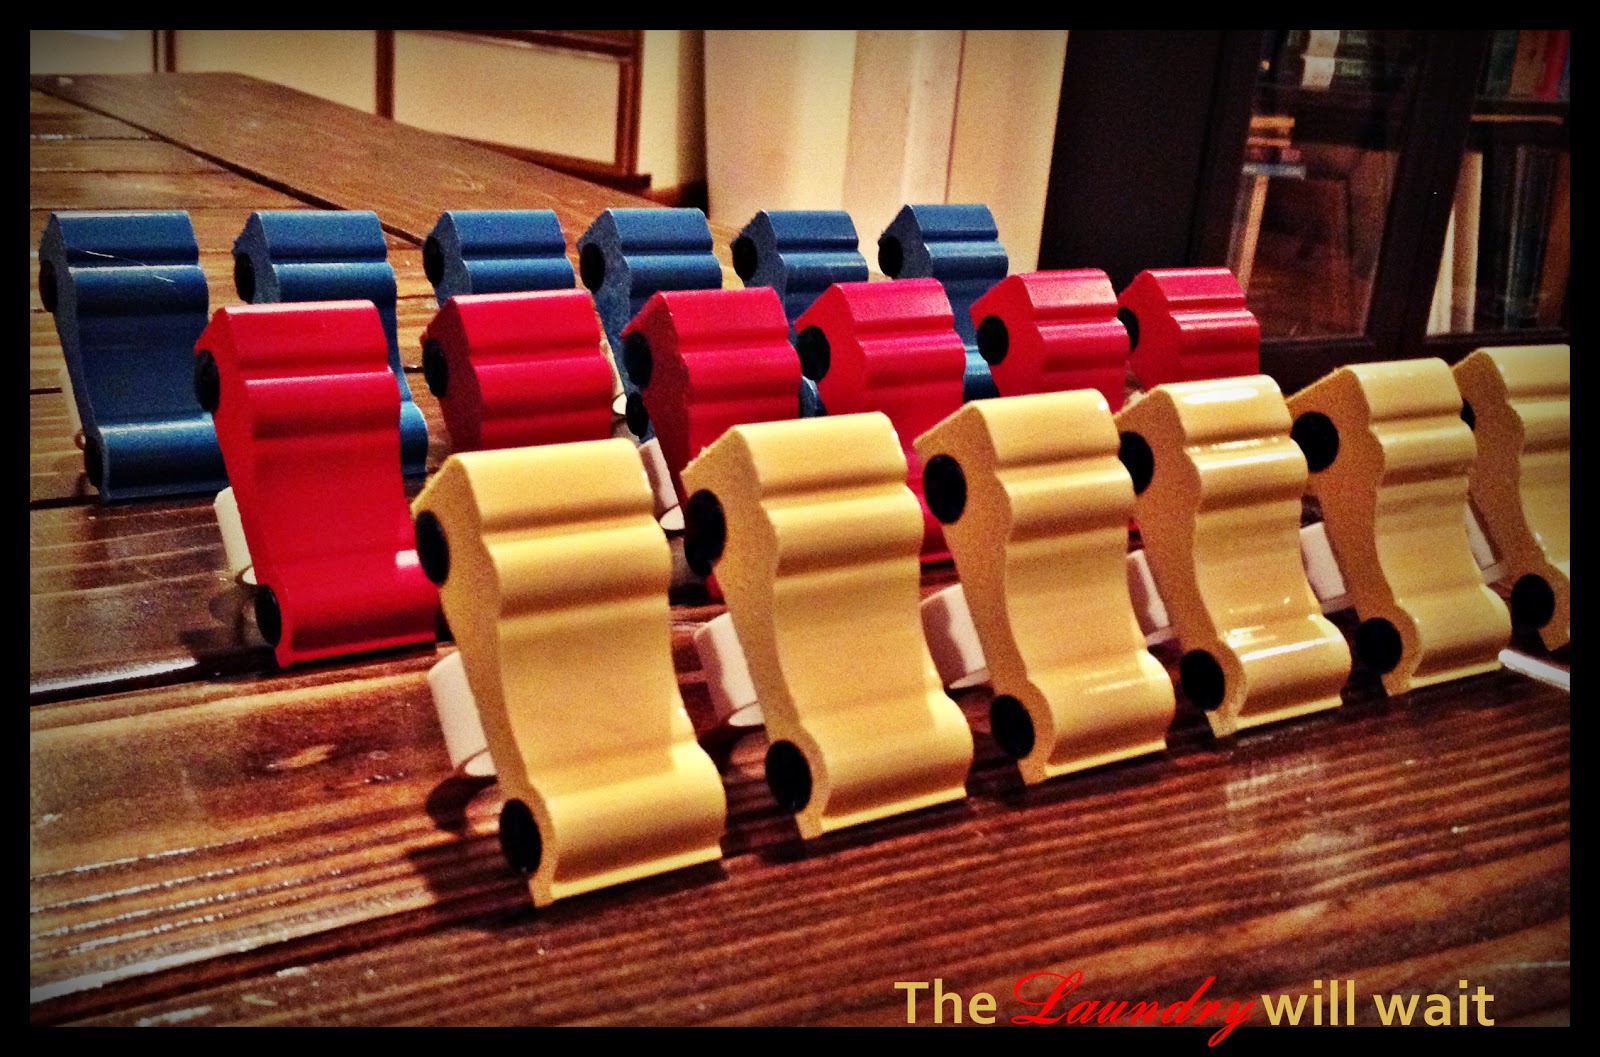
I help out with my son's cub scout den meetings and I'm able to contribute to some pack meetings as well. I came across this cute idea for neckerchief slides and below is my version of this fun craft. The cub scouts had their annual pinewood derby and these cars were available for the boys to decorate with paint pens & stickers. I think they enjoyed this fun little activity as they waited for everyone to weigh their cars for the big race.
 
just a simple piece of moulding, I think this 7-foot piece was $5 total
 
I cut each car into 1-inch pieces

the line-up pre-paint

Blue & Red
 
All three colors (Primary colors....had to do it!). Attached to the back (with hot glue) is a small piece of PVC pipe cut in 1/2-inch pieces. This project was SO simple yet so many people oohed and awed over it.

 
Happy Crafting!

Monday, December 31, 2012

Advent

 Okay, these advent calendars didn't get finished for our 2012 Christmas celebration but you can bet that they will be in full view and well used for Christmas 2013!
 
My friend contacted me about making these beautiful calendars and I couldn't resist, our inspiration came from here. While the original is lovely we wanted it to be a bit less busy and are happy with that decision.
 
The below pictures are a friend's calendar, we had fun picking out our paper colors and I think that they turned out super cute! I love the color scheme she went with.

 
These two photos below are of my color choices, after getting it all put together and seeing how the above green complements so well I was a little bummed that I didn't incorporate some myself. Oh well, I've got all year to make some more!

Happy Crafting!

Tuesday, December 25, 2012

water bottle

I love the opportunity to personalize things and Christmas was the perfect time to do such a thing! My son runs cross country and LOVES this quote. I thought it was very appropriate for a water bottle and hopefully I can work it into other projects as well....about that later!
 
"My sport is your sport's punishment"....I LOVE it!
Happy Crafting!

Tuesday, December 18, 2012

Merry Christmas to all the wonderful teachers!

Merry Christmas to all the wonderful teachers out there who take time each day to teach and love our children. It's been pushed to the forefront of everyone's minds just how blessed we are to have wonderful teachers who love our children like we their parents do, and as a parent of a student I am very thankful for that.
 
 
Here's the Christmas Teacher gifts I made this year for my boy's teachers. It's super simple, I found some {cheap} plastic ornaments at Walmart in their craft section {Walmart is wonderful for their prices but fail in customer service! It took two sales representatives who couldn't find these clear ornaments, they then left me on my own. Luckily I happened to come across them when searching out another item on my shopping list...shiesh!} anyway, I just filled them with cocoa mix, some mini chocolate chips, some red candy pearls and mallow bits.
 
 
What you'll need:
  • Clear plastic ornaments
  • favorite hot cocoa mix {I'm not a coffee drinker but I LOVE Starbucks cocoa!}
  • mini chocolate chips {not pictured....darn kids left the regular chocolate chips and made cookies with the minis!}
  • Jet-Puffed Mallow Bits {I found these at Safeway near the marshmallows on the baking isle on the top shelf}
  • red candy pearls
  • funnel for getting all these goodies into your ornament
Remove the ornament hanger from the plastic ornament and wash ornament thoroughly. Set aside to dry fully.
 
Once dry, use the funnel to pour in the cocoa mix a little at a time until you have your desired amount. I filled these ornaments at least half full or more. *after each ingredient is added tap ornament on counter to get everything to settle in, you want it a little snug so things don't mix all together before you're able to give this fun gift*.
 
Still using the funnel pour in mini chocolate chips shaking ornament side to side gently to get it to spread to the edges. Repeat this step along with the pearls remembering to tap and shake as you go, then the mallow bits. I really packed the mallow bits in, tapping and shaking until not another one could be added.
 
Replace the ornament hanger {yes some bits will get crunched, that's the price that has to be paid}. Attach a label with instructions. With the cocoa I had, these were the directions I used:
 
Directions:
1) sift contents
2) mix 2 Tbsp. cocoa mix with 8 oz. warm/hot milk
3) sprinkle toppings if desired
 
Top it off with a wonderful bow and there you have it a great teacher gift!
 
Hope you enjoy making these as much as I did!

Rectangle Ornament
 
Bulb Ornament
 
Happy Crafting!